


.webp?width=250&height=131&name=how-to-use-gdms-q1-2024%20(1).webp)


A captive portal has a variety of benefits when deployed into a Wi-Fi network. Being able to keep control of who can access the network, provide lead generation for commercial Wi-Fi environments, or ensure the user accepts terms and conditions are all advantages of a captive portal. Setting up a GWN captive portal is an easy process, and the variety of features available means that you can create a captive portal that is ideal for your deployment. Within this blog post, we’ll provide a step-by-step guide to creating a captive portal for the GWN series of Wi-Fi Access Points.

Step 1: Host by Access Point, GDMS Networking, or GWN Manager
Just as our access points can be managed by their built-in controller, our cloud-based management system GDMS Networking, or on-premise software platform GWN Manager, captive portals can be created through any of these platforms as well. How you’re managing your access points will determine where you are creating the captive portals that will be used by the network. It is worth noting, captive portals created on GDMS Networking or GWN Manager have additional analytical information such as the number of guests over a time period, current guest sessions, and login failures. Captive portals that are created on GDMS Networking or GWN Manager can also more easily be applied to various access points/SSIDs by using the management platforms’ configuration options.
Step 2: Familiarize Yourself with the Captive Portal Configurations
Once a decision is made on how to manage the captive portal for the network it is being deployed for, creation can easily be done by either the controlling GWN, GDMS Networking, or GWN Manager. No matter which platform, captive portal creation is done by clicking the “Captive Portal” menu option on the platform's web page. There are 4 sub-menu items to familiarize yourself with:
- Guest – This submenu will display information about the clients that are both currently connected and have connected via all captive portals. Information provided is the clients’ MAC address, Hostname, Access Point, SSID, RSSI, Authentication Type, Policy, Start Time, Expiration Time, and Certification State. Clients and their information can be exported or filtered via the Guest submenu, this includes custom field information entered via the captive portal such as email, phone number, etc.
- Policy List – The Policy List submenu is where to begin constructing a captive portal. Not only is the captive portal created here, but also its details such as client expiration time, which splash page to use, authentication rules, and more. We’ll take a deeper look at this in Step 4.
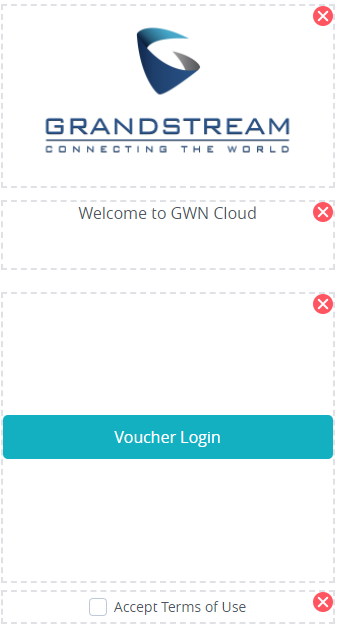
- Splash Page – The Splash Page submenu provides an in-depth tool to customize the splash page that clients will be directed to when accessing an SSID’s Wi-Fi connection through the captive portal. A splash page can have customized imagery, text, terms of use, background color, and a variety of login components. The following login components are available with Grandstream’s captive portals:
- Free – Provides a button that allows users to log in without inputting any information. This is ideal if a network only requires the users to accept the terms and conditions of the network.
- Simple Password – A simple password that is the same for every user logging into the network via the captive portal. This password is set within the splash page submenu GUI.
- RADIUS Server – For more advanced security, a RADIUS (Remote Authentication Dial In User Service) server can be utilized to match a user’s credentials with those that are on the RADIUS server’s directory. For more information on this, please read our How-to Guide.
- Voucher – Through the web GUI, it is possible to create printable vouchers that have specific codes that are used for captive portal sign-in. This can be used by coffee shops, hotels, and other commercial businesses to provide guests with temporary Wi-Fi access that lasts for a specified time frame.
- Custom Field – The custom field login option allows a network admin to create a set of form-fillable boxes to be filled out for Wi-Fi access. Preset fields such as email, name, and phone number are available, along with customized check box, radio selector, text, and date fields. All form options can be required or optional.
- SMS – Specified codes can be sent to a client’s phone via text by using the SMS login option. Once the code is received, it can be used to connect to the Wi-Fi SSID via the captive portal.
- Facebook, Twitter, or Google – Social login can be done with Facebook, Twitter, or Google. Users can use their logins on these platforms to obtain a captive portal key, which they can then use to connect to Wi-Fi.
- Advertisement – It is possible to direct users to either image or video content when they log in to the captive portal through the splash page. Through the advertisement tab on the Splash Page submenu, image or media content can be uploaded and run during each sign-in. A forced watch duration can be customized, along with a present date and time for the advertisements to begin running. After being viewed, a user will be able to access the Wi-Fi connection.
- Vouchers – The final submenu item for captive portals, the Vouchers menu is used to create password vouchers that are utilized for the voucher login option on the splash page. Vouchers are printable codes that can be utilized to provide users with limited-time Wi-Fi connections via the captive portal. When creating a new voucher, you can first decide how many codes to make, how many devices each code can support, the duration of Wi-Fi connection (in days, hours, and minutes) that voucher supports once it is used, how long the voucher stays valid before it is used, and lastly any upload, download, and total byte limits. Once created, a PDF can be exported that has up to six (6) vouchers per page and then printed. Vouchers can also be customized with a logo and short slogan.
 Step 3: Creating a Splash Page
Before going into more of the advanced configurations of the captive portal, the splash page that users will land onto needs to be created first. This splash page will then in turn be connected to a designated SSID when creating a captive portal. As was covered in step 2, the splash page is the actual landing page that a client will land on when connecting to a Wi-Fi network that the captive portal is connected to. When creating a splash page, it is important to understand what the objective of the captive portal is. As we covered in step 2, there are a wide variety of login options for a splash page, and not every one of them will be the right choice for every deployment. If the captive portal is simply there to force users to accept terms and conditions, then the “For Free” login component is the correct choice. If a deployment requires users to submit email and name information, then a custom field login would be ideal. Whichever login method is chosen, a splash page can be completely customized and once created will be ready for use for our captive portal.
Step 4: Policy List
Creating a Policy List is what brings together the different aspects of a captive portal and provides a more detailed configuration. When creating a policy list, first choose from a series of required fields such as the name, client expiration time limit (chosen from days, hours, and minutes), and splash page. However, even after this, there are many settings that can be used to alter the way that the captive portal behaves and how clients can access the network behind it. For example, the landing page after authentication through the captive portal can be set to either go to the URL the client was originally attempting to access or to a predefined URL such as a hotel’s website.
Step 5: Associate the Captive Portal with the SSID
Now that the captive portal has been created, a splash page customized, and configuration details finalized, it can now be associated with an SSID. In the Web GUI of either your master GWN or GWN management platform, click on the SSID primary menu item. Next, find the desired SSID and edit it. Finally, check the “Enable Captive Portal” option and then select the captive portal that has been created. The captive portal will now be associated with the SSID and all future logins must go through the portal prior to accessing the internet.
A captive portal is a helpful tool to ensure users submit specified information prior to connecting to a Wi-Fi network's SSID and to keep that network secure. All networks are different, and Grandstream's GWN captive portal features allow you to create a customized login process that fits the network. Whether it is to collect user data to be used as leads, force the user to accept terms and conditions prior to connecting, authenticating with a RADIUS server, or providing physical vouchers for Wi-Fi connectivity, a captive portal keeps a connection secure and customized.
Interested in learning more about Grandstream Wi-Fi solutions? Head to our solution page for a variety of resources.
